.svg)

When someone searches for a keyword related to your organization, you want your website to rank at the top of the Google results page every single time. The key to doing so lies in a long-term effort: search engine optimization (SEO). The challenge of SEO, though, is that it can be a slow-moving process that takes time to produce results. Association marketers who want to fast-track their websites to the top of the search engine results page look to Google Search Ads for an immediate solution.
Google Ads are known as PPC (pay-per-click) advertising. This means exactly what it sounds like - you pay when your ads are clicked. As an advertiser, you have control over which keywords trigger your ads. Advertisers bid, or say they will pay a max amount, for one click on a specific keyword. The costs per click (CPC) can vary widely depending on the industry and level of competition.
Pro-tip: Google Ads offers grants up to $10,000 per month for nonprofits and charities. Your association or membership-based organization might qualify, do be sure to check out Google Ad Grants to see if you can take advantage of this offer.
If you want to learn how to set up your first Google Ads campaign, use this guide to get started!
Google Ad Basics
When creating your first campaign, you’ll need to first understand the basic account structure:
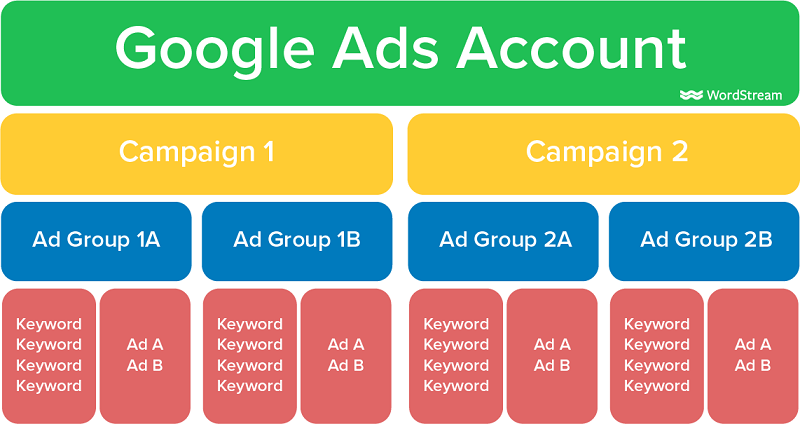
- Campaigns: The highest level of organization within an ad account. Your campaign is the primary goal you want your ads to achieve. Within each campaign, you can have multiple ad groups.
- Ad groups: These are organized groups of keywords that live within campaigns.
- Keywords: These are the individual phrases your ads will show up for when someone conducts a search. They are organized inside ad groups. You can also have negative keywords that prevent your ads from showing up for certain terms.
- Ads: This is your actual advertisement, with headlines, descriptions, extensions, and a link to your website. Ads should be written to include the ad group’s target keywords.
How To Create Google Search Ads for Associations
1. Create and set up your Google Ads account
Sign up for Google Ads here using a Gmail address. Make sure you use an email account that is connected to your association. Using a personal account only one person has access to can cause a big administrative headache.
Fill out your business and billing information. If you will be tracking conversions, such as new member registration, phone calls, purchases, or another action, you’ll want to set these up before your ads start running.
- Navigate to tools and settings → conversions.
- Create a new conversion action.
- Choose if your conversion will be imported from Google Analytics (you’ll need to link both accounts in order to do this), phone calls, or your website.
- When you select website, which is the most common type of conversion to track, you’ll answer a few questions and be given a tag to add to your website.
- Add the tag to your website through Google Tag Manager or by adding it to your website code.
2. Get organized: plan out your campaigns and ad groups
Start getting organized by breaking down your offerings into groups. (The structure of your website might help with this organization!) Think about what your association’s goals are and what you want to promote.
Ultimately, these categories will turn into your campaigns and ad groups.
Campaigns for associations might include Membership, Events, Training, Certification, and other core categories. Within each campaign, ad groups would be more targeted. For example, within the certification campaign, your association could have specific ad groups for each type of certification you offer. Within the membership campaign, you may have distinct ad groups that target each stage of the funnel. Read this post for search ad strategy ideas.
3. Research keywords
Within each ad group fall relevant keywords. Use the structure you mapped out, along with your website copy, to create a list of seed keywords. This list won’t be perfect, but it’s good to start with a general idea of which search terms you want your ads to appear for.
That seed list can then be validated by data found in the keyword research process.
Google has a free tool called Keyword Planner that’s helpful in understanding how competitive your target keywords are, how often they are searched, and how much you can expect to pay for a single click. Keyword Planner can also help you discover related relevant keywords your audience is searching for that you may not have thought of before.
Use this to gather your keyword list sorted by ad group.
4. Write ads
Your ad copy should include the keywords you’re bidding on in the copy as much as possible. You’ll also want to include multiple ads in each ad group to test the best-performing copy to find out what resonates most with the target audience.
Google search ads are limited in characters:
- Each headline can have 30 characters
- Each description can have 90 characters
5. Set up and launch your campaign
Now that you have your foundation laid and strategy planned out, it’s time to set up your campaign!
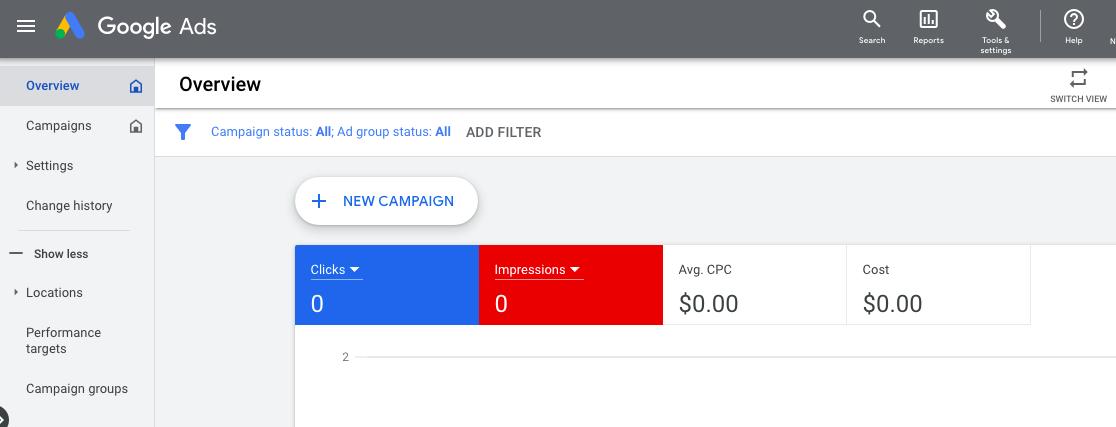
Open Google Ads, click on the tools icon, and select expert mode. This will give you more control over your campaigns and settings.
Press New Campaign.
This will bring you to a guide that walks you through everything you need to do to set up your campaign, starting with goal selection. Choose the goal that best describes what you want your campaign to achieve. Or, if you want to manually choose a bid strategy or manage your account, you can select “Create a campaign without a goal’s guidance.”
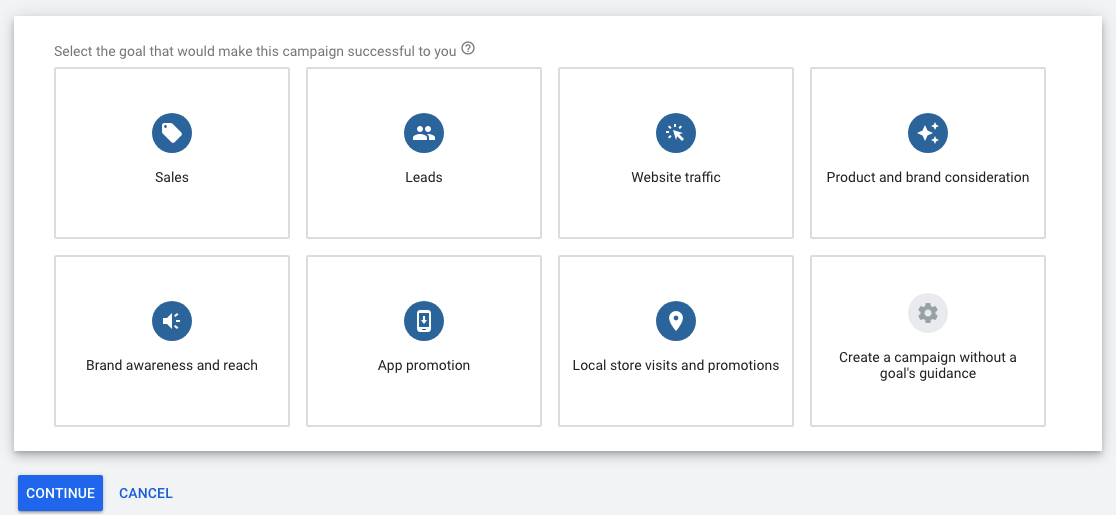
Depending on which goal you select, this will open different campaign types and ways to measure your goal.
Select search as your campaign type. (If you plan to create a display or YouTube ad later, do it separately.)
Note: Be sure to set up conversion tracking so you can be sure to measure leads, sales, and other conversions acquired through Google Ads.
Next, you’ll set a daily budget indicating how much you want to spend per day.
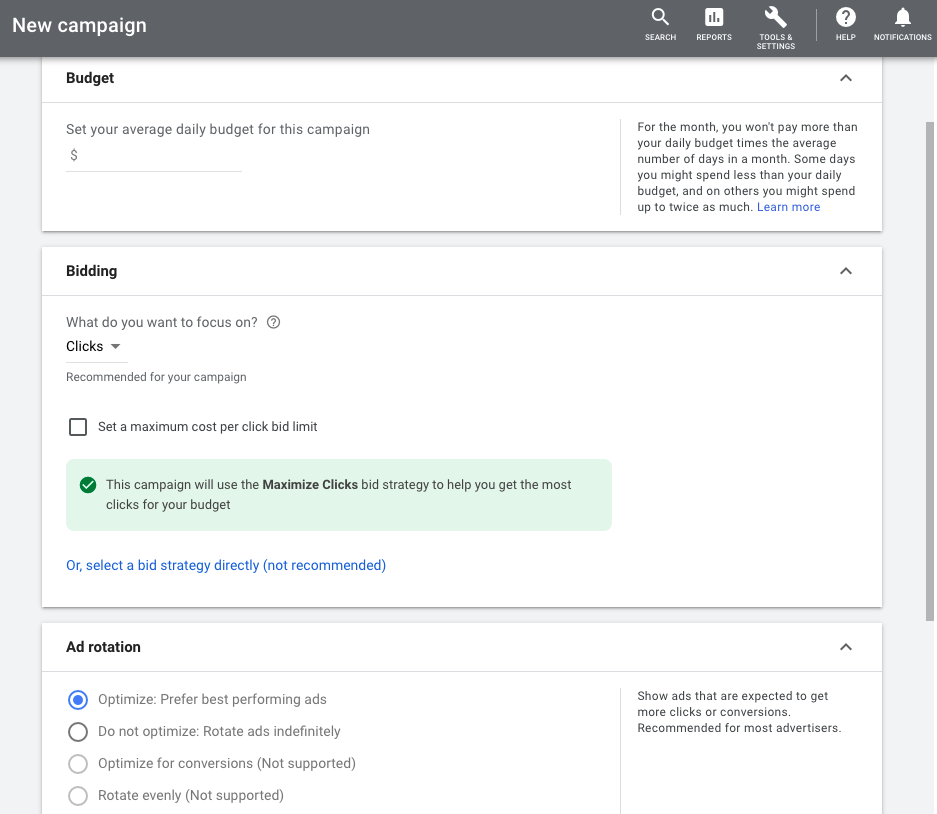
Choose the metric you want to optimize your ads for, whether it’s clicks, conversions, or something else. This ties directly to the bid strategy your campaign will use.
On this page, you have the ability to choose more settings, like ad rotation and selecting which conversion actions to track for the specific campaign. You may have multiple different conversions in your ad account, but not every conversion will be the right fit for each campaign. For example, the conversion goal for a membership campaign could be a new member registration, but a conversion for a training events campaign could be a ticket purchase. Both conversions would live in the same ad account, but you’d select which conversion action is the right fit for your goal at the campaign level.
Ad rotation refers to how you want Google to choose which ads to show — it can rotate them indefinitely or display the top performers. More hands-on advertisers typically prefer to rotate ads indefinitely so they can collect data on their ads and messaging and make revisions manually.
Next up are campaign settings, with networks, locations, language, audiences, and more ad settings.
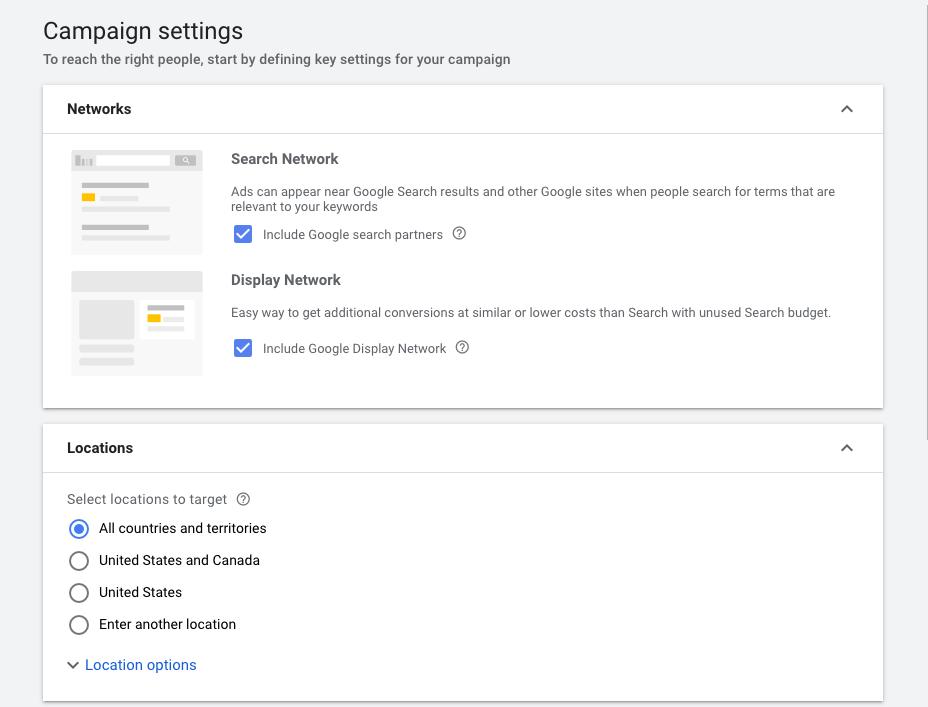
For networks, uncheck display network, and uncheck “include Google search partners” unless you have a large, generous budget. Including search partners can open your ads up to a wider audience that may be less relevant.
Choose any specific locations you want to target and select your audience’s language.
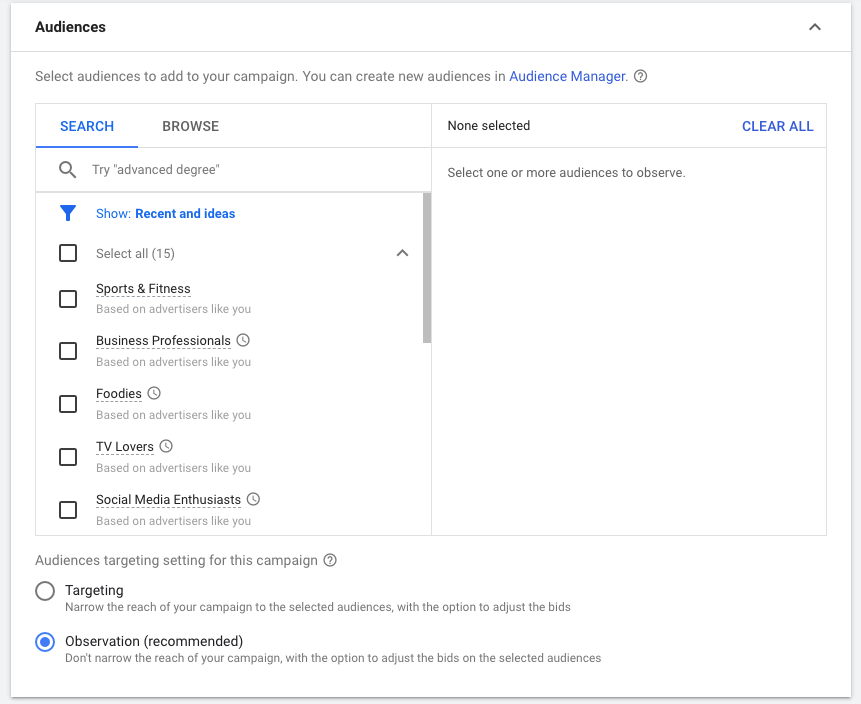
The next setting is audience targeting. Because your search campaign is based on keywords, you’ll likely want to skip this section. Selecting specific audiences with the “targeting” option will prevent your ads from showing to people who search for your keywords if they don’t meet the criteria of your selected audience. Observation audience targeting provides you with insightful data on who your audience is and how different groups interact with your ads, but it’s not necessary for those just starting out with Google Ads.
From this screen, you can also set custom start and end dates and an ad schedule indicating what days and times your ads should run. Some associations opt to run ads only on the weekdays to conserve budget, though this could potentially limit showing up for qualified audiences who search over the weekend.
Next up: keywords and ads.
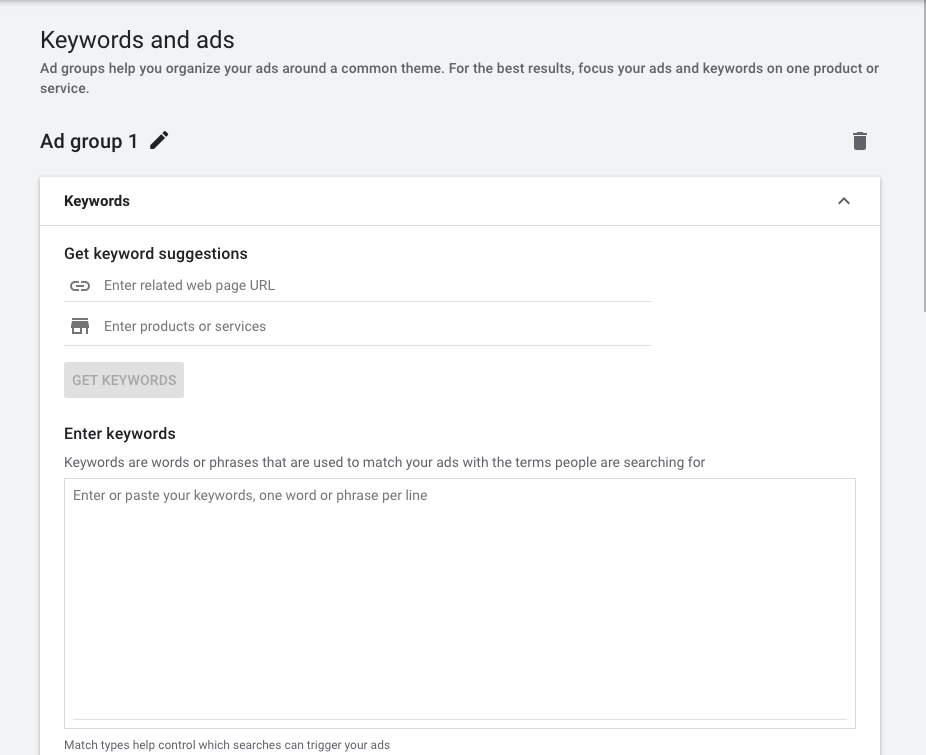
Here, name your first ad group and input the relevant keywords. Remember to keep your keywords tailored to that specific theme or topic — you don’t want your entire account’s keywords in a single ad group. There are different types of keyword match types — read this to familiarize yourself with the different types and when to use them.
On the same screen, you’ll create your first responsive ad that matches the ad group. Make sure your landing page matches the keywords to improve your quality score and reduce your cost per click. For example, if this ad group targets non-branded membership-related keywords, don’t enter your home page as the final URL. Instead, use your membership landing page as the final URL. This provides a better user experience for your audience.
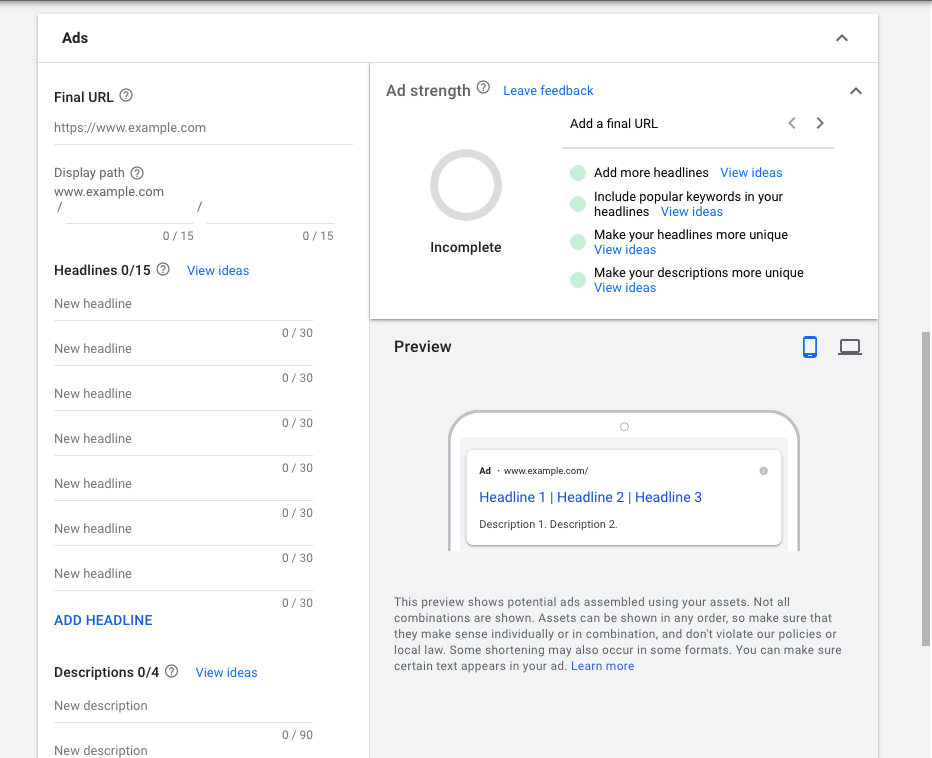
Add up to 15 30-character headlines and four 90-character descriptions. If there are any specific headlines or descriptions you want to appear every time your ad is shown, you can hover your mouse over the right side of the field and pin them to a certain position.
If your campaign will contain more than one ad group, press “Create another ad group” and repeat the process.
After you create your ad group, Google will guide you to create extensions to go with your ad. These provide more information and help your ad take up more real estate on the search engine results page. Sitelinks, which provide navigational links to other pages of your website, and callouts, which provide 25 more characters for you to highlight your benefits, are two great options for associations.
You can also consider other types of ad extensions, like:
- Call
- Structured snippet
- Lead form
- Price
- Promotion
This is an example of an ad with call, callout, and sitelink extensions:
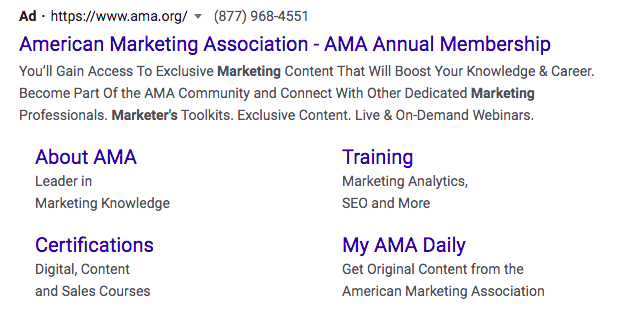
Because of the extensions, it takes up more than twice the amount of space on Google a regular ad would!
After you’ve added extensions, you have the chance to review your campaign before it goes live. Triple-check your budget, make sure your ad groups are organized, your ads have no typos, landing pages work, and all of the settings are correct.
If everything looks good, it’s launch time! After your campaign is live, be sure to monitor your performance to see how it’s doing. Check your click-through rate, cost per click, conversions and conversion rates, as well as your search terms report. Your search terms report shows you the exact phrases people entered in Google to trigger your ad and is a goldmine of new keyword ideas and negative keywords to add to your list.
To learn more about Google Ads before spending any of your budget, Google offers an excellent free resource: training and certifications through Google Skillshop. This is a great way to familiarize yourself with the essential Google Ads concepts and how it works.
For more guides on digital marketing for associations, check out these posts: